FAQ
1. After creating your account, you can download the appropriate application for your operating system
2. After launching the application, you need to enter the login and password you created during sign-up
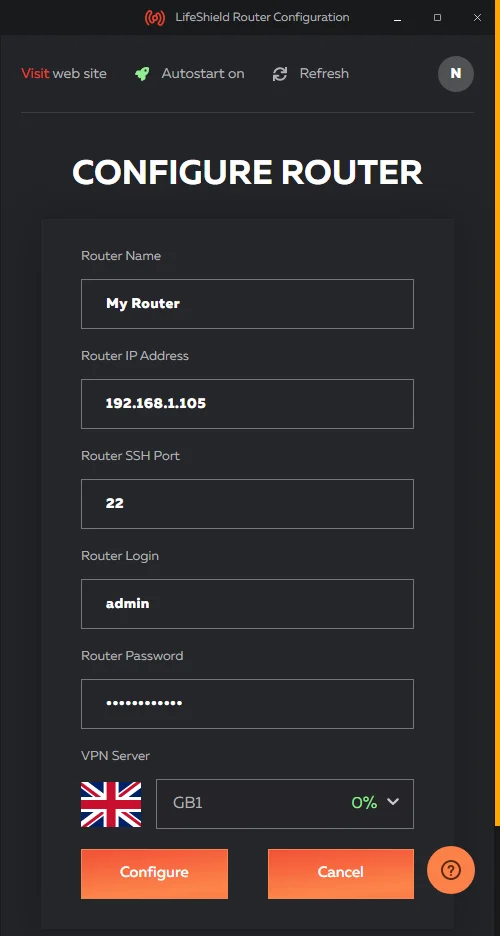
3. As soon as you logged in, you need to enter the information to configure your router automatically:
- - Router name (it can be any name that you want)
- - The IP address of the router. It will be automatically recognized
- - SSH Port. The default settings are 22
- - Router Login. Login from your router
- - Router Password. Your router password
- - Select server location
4. After configuring your router, you will get a control panel for the service
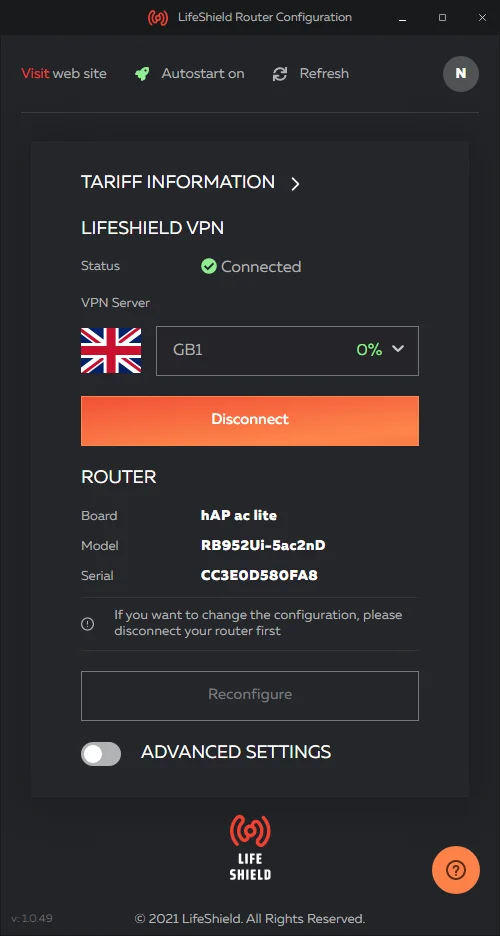
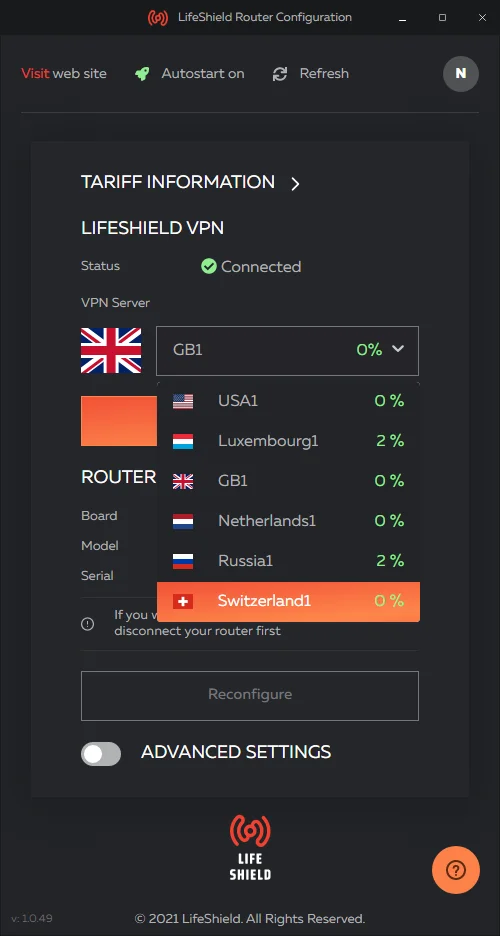
5. There you can change the location of the connection
6. There you can use additional functions of the application
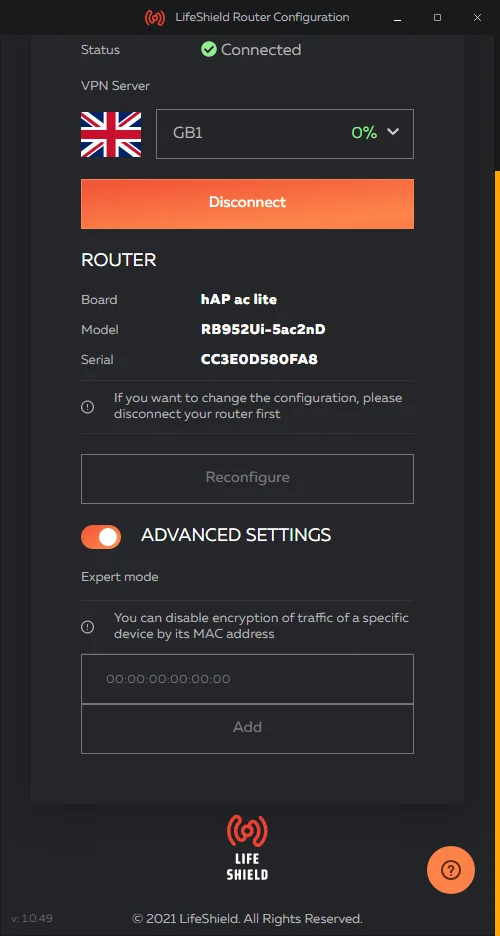
7. To see information about the tariff and terms of use

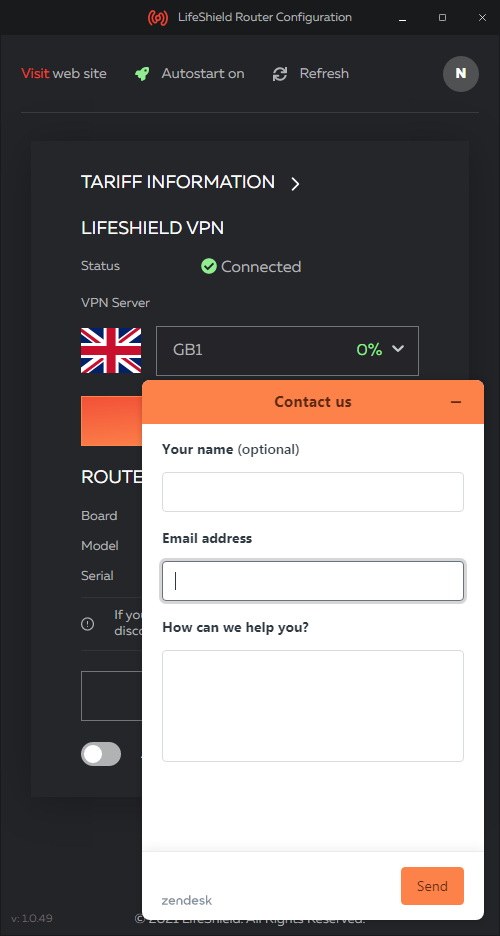
8. If you have any questions, you can contact our support
When you enable the Expert mode, you have an opportunity not to encrypt the received and sent data on the devices you need, e.g., a TV set, a game console, an IPTV set-top box, a fridge, etc.
How does it work?
In the settings of the device, you need to find its MAC address. Most likely, it is in the network settings.
Then type it in the entry field of the "Expert mode" section.
Enjoy!
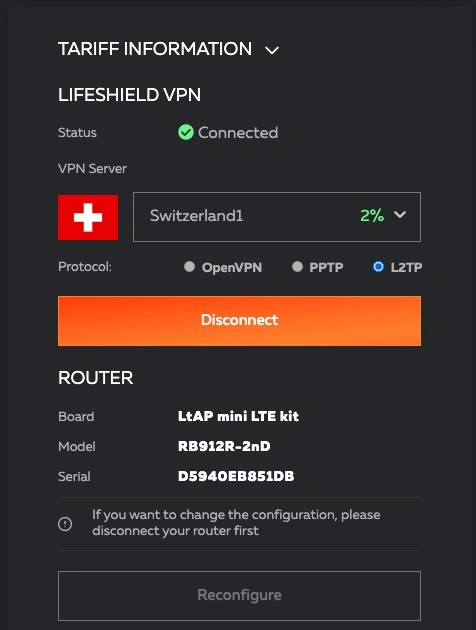
How does encryption protocol switching work?
In the new version of the application, you can switch encryption protocols. To change the encryption protocol, you need to:
- disable the VPN connection by clicking on the Disconnect button
- select the encryption protocol you need
- click on the Connect button
- after a few seconds, the connection to the server will be established
Also, we remind you that the OpenVPN encryption protocol is more secure. Therefore, in special cases, we recommend using OpenVPN. If you have any questions, please contact support 24/7.
For clients with a static (white) IP address
1. Connect the router to the power supply (preferably using a standard power supply) and insert the provider's network cable into the external port of the router (usually ether1).
2. Connect any device convenient to you to the router:
- A network cable to a personal computer or laptop;
- Via WIFI to a personal computer or laptop;
- Via WIFI to a mobile phone or tablet;
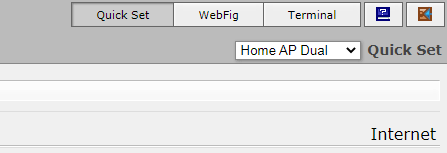
3. To enter the router settings, enter 192.168.88.1 (factory address of the router) in the Internet browser, login "admin", no password.
During the initial setup using a smartphone or tablet, you can use the MikroTik app.
4. In the "Quick Set" section, you need to create a password for the administrator. We recommend changing the WIFI name and setting a password for it. Also, we recommend that you read the section on security settings.
5. To connect the router to the Internet, you must enter the settings of your provider. You can get them in any way convenient for you (personal account on the provider's website, call center, look in the service agreement).
6. For the stable operation of the router, we recommend updating the RouterOS. You can check and update by clicking on "Check for Updates". Your router is ready for further configuration of our service.
Your router is ready for further configuration of our service.
For clients with dynamic or private (gray) IP address
1. Connect the router to the power supply (preferably using a standard power supply) and insert the provider's network cable into the external port of the router (usually ether1).
2. Connect any device convenient to you to the router:
- A network cable to a personal computer or laptop;
- Via WIFI to a personal computer or laptop;
- Via WIFI to a mobile phone or tablet;
3. To enter the router settings, enter 192.168.88.1 (factory address of the router) in the Internet browser, login "admin", no password.
During the initial setup using a smartphone or tablet, you can use the MikroTik app.
4. In the "Quick Set" section, you must set a password for the administrator. We recommend changing the WIFI name and setting a password for it. Also, we recommend that you read the section on security settings.
5. Your router will automatically receive your ISP's settings (if it receives an address via DHCP). If the non-routable (gray) IP must be set manually, enter the IP, subnet mask, gateway and DNS server in the corresponding fields. In case of problems, you need to contact your internet provider.
6. For stable and safe router operation, we recommend updating RouterOS. You can check and update by clicking "Check for Updates".
Your router is ready for further configuration of our service.
- 1. The router has be connected to a power supply, network cable, and the settings of your Internet provider must be set to it.2. The router has be connected with a network cable or WIFI to your PC.
- Using an internet browser, log into your router.Factory IP address 192.168.88.1 login "admin", no password (if you haven't done the initial setup).
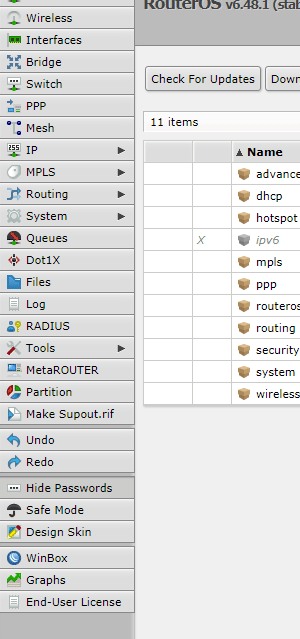
- 3. Update 'Router OS':
- WebFig - System - Packages - Check for updates
If 'System is already up to date' is specified, then the system is updated. If 'New version is available' then you need to update.Download and installAs soon as the download and installation are complete, the router will reboot. - Login to router
System - Routerboard - Reboot – OK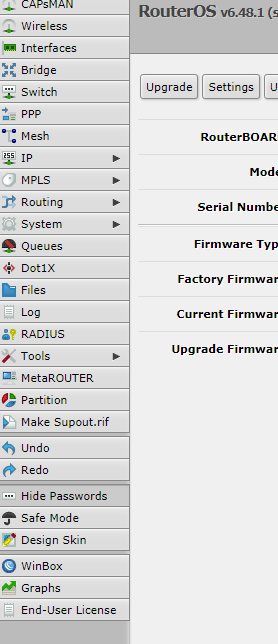
After installing the update, the router will reboot and you will use the latest version of 'Router OS'We recommend you update your router regurarly to avoid problems when using our service. Also, when installing a new version of the software, the security problems of the router found at the time of the release of the update are eliminated.
When buying a WiFi router, especially with an operating system that is complex for an inexperienced user, you need to pay attention to secure WiFi configuration. The standard Router OS settings will be extremely insufficient for normal use, since by default Mikrotik does not have a WiFi password and an unreadable network name (SSID). Therefore, out of the box, WiFi needs to be configured. If you do not know how to make WiFi secure from intruders or you have special needs for using a WiFi network, this information will be useful to you.
Three tabs located in the "Wireless" section of the "WebFig" menu are responsible for protecting the WiFi network in Mikrotik:
- Access List
- Connect List
- Security Profiles
Access List
Access List is a list of rules that restrict connections of other devices to your WiFi router, and also serve to control connection parameters. (ap mode).
For example: you want to restrict devices connecting to your WiFi by MAC addresses.
Connect List
Connect List - a list of rules that allow or restrict the connection of your WiFi router with other access points (station mode).
For example: you have a large house or office and you have added several additional access points to the main WiFi router. This function will allow you to connect to a station with maximum signal reception.
Security Profiles
Security Profiles - this section is used to configure security profiles and security keys for the wireless network.
We have prepared general recommendations that will be useful to you:
- 1. Use WPA2-PSK with aes-ccm encryption only. More modern than other protocols, WPA2 provides more secure WiFi.
- 2. Disable WPS. The function of connecting devices using a button on the body of the router. No password is required to connect to the router.
- 3. Use numbers, upper and lower case letters, special characters to create a password.)
- 4. Change the password on access points regularly. If a lot of people have access to a WiFi network or you have a high turnover in the office, change your password once a month or whenever you see fit.
- 5. If possible, restrict access by MAC addresses in the WiFi network. Only those devices that you register in the router will get access.
- 6. Uncheck the Default Forward checkbox in your interface settings - prohibit packet forwarding between WiFi clients. A connected client will not have access to the information located on the devices of other connected users.
- 7. Hide the SSID (WiFi network name) of your network. If a person does not know the name of the WiFi network, then he will not be able to connect to it because he or she will not see it on the list of proposed ones.
- 8. Change the MAC of the wireless interface - for difficult identification of the device. Some experts can hack WiFi by identifying it by its MAC address.
Enjoy using your WiFi network safely!
1. The router has be connected to a power supply, network cable, and the settings of your Internet provider must be set to it.
2. The router has be connected with a network cable to your PC.
3. Using an internet browser, log into your router. Factory IP address 192.168.88.1 There is no factory login "admin" password (if you haven't done the initial setup).
4. Update "Router OS":
WebFig – System – Packages – Check for updates
If it says "New version is available" then you need to update
Download and install
As soon as the download and installation are complete, the router will reboot and the indication of the use of the latest software version "System is already up to date"
System – Routerboard – Upgrade – OK – Reboot – OK
After installing the update, the router will reboot and you will use the latest version of "Router OS". With further use, you will receive notifications in your "Personal Account" about the need to update "Router OS".
We recommend you update your router regurarly to avoid problems when using our service. Also, when installing a new version of the software, the security problems of the router found at the time of the release of the update are eliminated.
5. Save the keys (files) .crt and .key on your PC
WebFig - Files – Upload
Select the previously copied .crt and .key files. Then they will be displayed in the file window.
WebFig – System – Certificates – Import – Only File
Select the .crt and .key files one by one
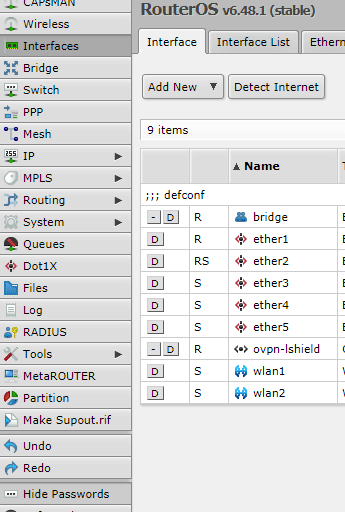
6. WebFig – Interfaces – Add new – OpenVPN client
- "Name" enter the server name specified in the Personal account
- "Connect to" enter the IP address of the server specified in the Personal account
- "User" enter the login specified in the Personal account
- "Certificate" select the imported file
- "Auth" select "sha 1"
- "Cipher" select "aes 256"
- In the top menu press "OK"
7. WebFig – IP – Firewall – Mangle – Add NewWebFig – IP – Firewall – Mangle – Add New
- "Src. Address" specify 192.168.88.0/24
- "Action" select "mark routing"
- In the "New Routing Mark" field, enter a route mark. To avoid confusion, we recommend using the location name (server location) in the tag name.
- In the top menu press "OK"
8. WebFig – IP – Firewall – Nat – Add New
- "Chain" select "srcnat"
- "Src. Address" specify 192.168.88.0/24
- "Out. Interface" select OpenVPN with the name of your server
- "Routing Mark" select the route mark selected in p. 7
- "Action" select "masquerade"
- In the top menu press "OK"
9. WebFig – IP – Routes – Add New
- "Gateway" select the server name
- "Check Gateway" select "ping"
- "Type" select "unicast"
- "Routing Mark" select a route mark from p. 7
- In the top menu press "OK"
10. WebFig – IP- Firewall
In the column "Action" find "fasttrack" and disable it by pressing the symbol "D" or delete it by pressing the symbol "-". In the standard firmware of the router, there will be two such rules, one of them will not be disabled or deleted. It will disappear by itself after disabling / deleting the second rule and restarting the router.
11. Enjoy!!
1. The router has to be connected to a power supply, network cable, and the settings of your Internet provider have to be set to it.
2. The router has to be connected with a network cable to your PC.
3. Get the server address, login and password to your mail.
4. Using an internet browser, log into your router.
- Factory IP address 192.168.88.1 There is no factory login "admin" password (unless you did the initial setup).
Update Router OS:
- WebFig – System – Packages – Check for updates
- If it says "New version is available" then you need to update
Download and install
- As soon as the download and installation are complete, the router will reboot and the indication of the use of the latest software version "System is already up to date"
System – Routerboard – Upgrade – OK – Reboot – OK
- After installing the update, the router will reboot and you will use the latest version of Router OS
- With further use, you will receive the notifications about the updates in your Personal Account.
- We recommend you update your router regurarly to avoid problems when using our service. Also, when installing a new version of the software, potential threats of hacking the router are eliminated.
WebFig – Interfaces - Interface
- Add New – PPTP Client
- In the field "Name" indicate the name, for example "pptp-Luxembourg"
- "Connect To" specify the received server IP
- "User" specify the received username
- "Password" specify the received password
- "Keepalive Timeout" select "60"
- "Allow" uncheck "chap", "pap" and "mschap1"
- In the top menu press "OK"
The interface with the selected name will appear on the "Interface" list, in our example - "pptp-Luxembourg". Wait until the "R" symbol appears in the line to the left of the tunnel name - this will mean that the connection to the server is established
In the left menu click IP - Firewall – Mangle - Add New
- "Src. Address" specify 192.168.88.0/24
- "Dst. Address" specify 192.168.0.0/16
- "Action" select mark routing
- "New Routing Mark" indicate the name of the route mark, for example "mark-Luxembourg"
- Press "OK"in the top menu
WebFig – IP – Firewall – Nat – Add New
- "Chain" select "srcnat"
- "Src. Address" specify 192.168.88.0/24
- "Dst. Address" specify 192.168.0.0/16 16 and click on the square to the left of the address field - an exclamation mark should appear there
- "Out. Interface" select the interface name, in our case - "pptp-Luxembourg"
- "Routing Mark" select the interface name, in our case - "mark-Luxembourg""
- "Action" select "masquerade"
- • In the top menu press "OK"
WebFig – IP – Routes – Add New
- "Gateway" select the server name "pptp-Luxembourg"
- "Check Gateway" select "ping"
- "Type" select "unicast"
- "Routing Mark" select the server name "pptp-Luxembourg"
- • In the top menu press "OK"
WebFig – IP- Firewall
- In the column "Action" find "fasttrack" and disable it by pressing the symbol "D" or delete it by pressing the symbol "-". In the standard firmware of the router, there will be two such rules, one of them will not be disabled or deleted. It will disappear by itself after disconnecting / deleting and rebooting the router
Enjoy the use!
1. The router must be connected to a power supply, a network cable, the settings of your Internet provider must be set on it, and your PC must be connected to the router with a network cable (or via WiFi).
Using an internet browser, log into your router. Factory IP address 192.168.88.1 (If you have not changed this setting).
Update "Router OS":
- WebFig – System – Packages – Check for updates
- Если указано "New version is available" значит необходимо обновить, нажав кнопку "Download and install”
- If "New version is available" is indicated, then you need to update by clicking the "Download and install" button. As soon as the download and installation are complete, the router will reboot and the indication of the use of the latest software version "System is already up to date"
System – Routerboard – Upgrade – OK – Reboot – OK
- After installing the update, the router will reboot and you will use the latest version of "Router OS"
- Save the keys (files) .crt, .key and .rsc on your PC
WebFig - Files – Upload
- Select the previously copied .crt and .key files. Then they will be displayed in the file window.
WebFig – System – Certificates – Import – Only File
- Select the .crt and .key files one by one
WebFig - Files – Upload
- Select a previously saved file, for example "o-lux.rsc". Then it will be displayed in the file window
- In the upper right corner go to "Terminal"
- At the bottom line, enter the command to run the file you received. For example: import file = o-lux.rsc
Enjoy!